

Planning a whole home renovation often starts with the fun stuff: new countertops, fresh paint, a reimagined layout. But the systems hiding behind your walls, under your floors, and outside your property line are what actually keep a house safe, functional, and comfortable for decades. Skipping them in your budget doesn’t make them disappear, it just means you’ll pay more later under emergency conditions. This guide walks through the often-overlooked property systems that deserve a real line item in your renovation plan.
Water Heating and Hot Water Delivery
Most renovation budgets account for new fixtures and tile, but the equipment that actually delivers hot water to those fixtures often gets ignored until it fails mid-project. A home undergoing major plumbing changes puts extra strain on an aging water heater, especially if you’re adding a bathroom or expanding square footage. Before finalizing your budget, have the unit inspected so you know whether it can handle increased demand or needs replacing outright.
Many homeowners discover during a renovation that their existing tank is already on borrowed time, and scheduling water heater repair proactively is far cheaper than dealing with a flooded utility closet after drywall is finished. Factoring this into your budget early also gives you room to consider tankless options if you’re already opening up walls for other work.
Heating and Cooling Equipment Upgrades

A whole home renovation is the ideal time to evaluate your heating and cooling equipment, since walls and ceilings are already open and ductwork is accessible. Many older systems were sized for a different floor plan, and once you reconfigure rooms, vault a ceiling, or add square footage, the existing equipment may struggle to keep up. A furnace or air conditioner that was adequately sized for 1,800 square feet will likely run constantly — and wear out faster — once it’s asked to condition 2,400 square feet. Budgeting for a professional HVAC service visit during the planning phase helps you avoid uneven temperatures and higher utility bills once the project wraps. A contractor can perform a load calculation (commonly called a Manual J) to confirm whether your current furnace, air conditioner, or heat pump can handle the new layout, or whether it’s time to upsize. This is also the moment to discuss ductwork: runs that were fine for a closed-off floor plan often need to be resized or rerouted entirely once walls come down and open-concept spaces are created. It’s worth setting aside funds for register and return placement changes, since poor airflow is one of the most common complaints in post-renovation homes. Homeowners should also budget for ancillary upgrades like a smart thermostat, zoning dampers for multi-level homes, or improved insulation around new ductwork, all of which affect long-term comfort and energy costs. Addressing these details while the infrastructure is exposed is far cheaper than retrofitting them after drywall and finishes are complete.
It’s also worth setting aside funds for ductwork modifications, since moving walls often means rerouting supply and return lines. A single relocated return vent or extended supply run can add $300 to $800 to a project, and homes that combine two rooms into one open-concept space often need an entirely new duct branch to keep airflow balanced. Beyond rerouting, it’s smart to have your HVAC contractor run a load calculation (often called a Manual J) before finalizing the renovation plans. Removing walls or adding square footage changes how much heating and cooling capacity each room actually needs, and skipping this check can leave your existing system either overworked or oversized for the new layout. Don’t overlook smaller components either, like dampers, insulation sleeves for ducts running through unconditioned spaces, and sealing at the joints. These add relatively little to the budget but make a significant difference in efficiency and comfort. Skipping this step can leave you with a beautifully renovated room that never quite feels comfortable, which defeats the purpose of the whole investment.
Roofing Condition and Structural Integrity

Interior renovations tend to steal the spotlight, but your roof is the system protecting every dollar you’re spending inside the house. Before committing to new flooring or cabinetry, it makes sense to have residential roofers assess the condition of your shingles, flashing, and decking, especially if your renovation includes an addition or dormer. A roof that’s nearing the end of its life can undermine even the most carefully planned interior work if a leak develops during or after construction. A thorough inspection should go beyond a glance from the ground. Ask your contractor to check for soft or sagging spots in the decking, granule loss on asphalt shingles, rusted or cracked flashing around chimneys and vents, and signs of moisture in the attic insulation. Roofs typically last 20 to 30 years depending on material, so if yours is already 15 years old, factoring in a partial or full replacement now can save you from redoing finished walls or ceilings later. Structural integrity matters just as much as surface condition, particularly if you’re adding square footage or load-bearing elements like a second story. Trusses, rafters, and support beams need to be evaluated for rot, pest damage, and whether they can handle new weight distribution. Budgeting a few hundred dollars for a structural assessment upfront is far cheaper than discovering a compromised frame after drywall is already hung.
Renovation budgets should include a contingency for roof repairs uncovered mid-project, since opening up attic space or adding skylights often reveals issues that weren’t visible from the ground. Common surprises include rotted decking, compromised rafters, inadequate ventilation, or old flashing that’s been quietly letting moisture into the structure for years. A reasonable contingency for roofing-related surprises is 10-15% of the total roofing or structural line item, set aside specifically for this purpose. It’s also worth having a roofing contractor or structural engineer inspect the attic and roofline before major work begins, not just after demolition starts. Catching signs of sagging rafters, water stains, or mold early gives you more accurate bids and fewer change orders once walls are opened. This is especially important if the home is older than 30 years or has had previous roof repairs that weren’t properly documented. Addressing these early protects your investment and prevents costly water damage down the line. Left unresolved, hidden roof damage can spread to insulation, drywall, and framing, turning a manageable repair into a five-figure structural fix.
Supply Lines, Drains, and Fixture Connections
Behind every renovated kitchen or bathroom is a network of pipes that rarely gets attention until something goes wrong. Relocating a sink, adding a second bathroom, or extending a laundry room all require careful planning around existing supply and drain lines. Bringing in a licensed plumber during the design phase, rather than after walls are already closed up, saves significant rework and expense.
Older homes in particular may have outdated piping materials that aren’t compatible with modern fixtures, and a thorough inspection can catch this before it becomes a mid-renovation surprise. Budgeting for potential pipe replacement alongside your visible plumbing upgrades keeps the whole system working together rather than patched together.
Debris Removal and Construction Waste Management
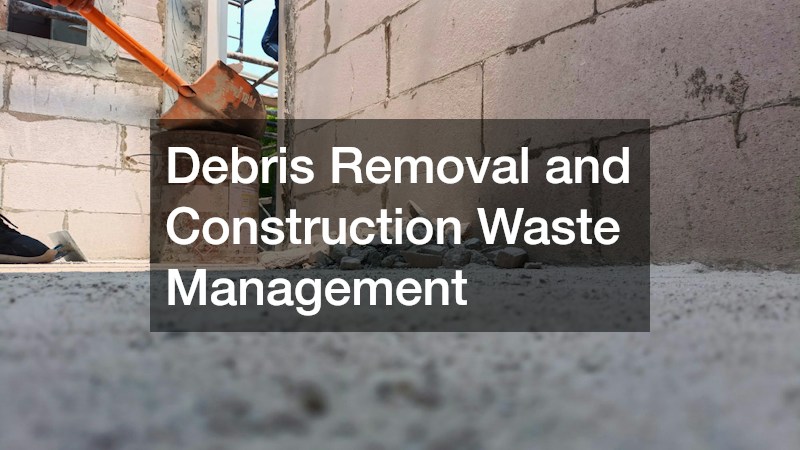
Whole home renovations generate an enormous amount of waste, from torn-out drywall to old cabinetry and flooring, and hauling it away is rarely included in initial cost estimates. Many municipalities now require construction and demolition materials to be separated, which makes working with a service specializing in c d recycling a practical way to keep your project compliant and reduce landfill impact. This is especially relevant if you’re removing large quantities of wood, metal, or concrete.
Planning for debris removal costs upfront also keeps your job site safer and more organized, which can actually speed up the timeline. Dumpster rental, hauling fees, and disposal charges can add up quickly, so it’s worth getting a realistic estimate before demolition begins rather than being surprised by it later.
Outdoor Storage and Workspace Additions
Renovation projects often spill outside the house, whether you need temporary storage for materials or you’re planning a permanent outbuilding as part of the overall property upgrade. Homeowners who need extra space for equipment, vehicles, or workshop areas are increasingly turning to hoop buildings as a cost-effective alternative to traditional stick-built structures. These structures can be erected relatively quickly and provide flexible square footage for storage or hobby use once the main renovation is complete.
If an outbuilding is part of your long-term plan, it makes sense to budget for site preparation and utility hookups at the same time as your main renovation, since bringing contractors back later for a separate project often costs more. Thinking about these additions holistically helps your property function better as a whole rather than as disconnected projects.
Pest Control and Outdoor Comfort Measures
A renovated home with a beautiful new deck or patio loses a lot of its appeal if you can’t actually enjoy the space due to bugs. Construction activity can disturb standing water and soil, which sometimes increases pest activity around a property during and after a project. Scheduling mosquito removal treatments as part of your landscaping and exterior budget ensures you can actually use your new outdoor living areas once construction wraps up.
This is particularly important if your renovation includes new outdoor features like fire pits, pergolas, or expanded patios where people will be spending more time. Addressing pest issues proactively, rather than reactively, keeps the investment in your outdoor spaces worthwhile.
Driveway and Paved Surface Maintenance

Heavy construction vehicles and material deliveries take a real toll on driveways and parking areas, and many homeowners don’t realize the damage until the renovation is finished. Concrete trucks, dumpster deliveries, and repeated trips from contractor trailers concentrate thousands of pounds of weight on the same stretch of pavement for months at a time, stressing surfaces that were never engineered for that kind of load. Cracks and potholes that develop during the project tend to worsen over time if left untreated, leading to more expensive repairs down the road. Even hairline cracks matter, since they allow water to seep underneath the surface and expand during freeze-thaw cycles, turning a minor flaw into a major structural problem within a year or two. A thorough post-renovation walkthrough should check for alligator cracking, edge crumbling, and low spots where standing water collects after rain. Catching these issues early typically costs a few hundred dollars in patching versus several thousand for a full repave. Including asphalt seal coating in your post-renovation budget helps protect the surface from water infiltration and extends its lifespan after months of heavy use. Sealcoating generally runs $0.15 to $0.25 per square foot and should be applied once any structural cracks are repaired, not before, since trapping damage under a fresh seal only accelerates deterioration. Plan to budget for this maintenance step within the first year after construction wraps up, and expect to repeat it every two to three years to keep the driveway protected going forward.
Driveway and paved surface maintenance heavy equipment, delivery trucks, and dumpster drop-offs during a major renovation take a real toll on driveways, walkways, and patios, often leaving cracks, oil stains, and compacted or uneven gravel in their wake. Asphalt driveways typically need resealing every two to three years, but post-construction stress can shorten that window considerably. Concrete surfaces may show hairline cracking that, left untreated, widens into costly structural repairs. Timing matters here, since sealing too early after construction traffic has stopped is actually less effective than waiting a few weeks for new asphalt to fully cure, while existing surfaces benefit from prompt attention before small cracks let in water and freeze-thaw damage. Budget roughly $0.15 to $0.25 per square foot for sealcoating, and more if crack filling or patching is needed first. Pavers and natural stone surfaces should also be checked for shifting or settling, since the same equipment that stresses asphalt can displace jointing sand and base material. Treating this as part of your overall renovation wrap-up, rather than a separate future expense, keeps your property looking finished from the curb to the front door. Get a contractor to assess surfaces before and after major work begins, so you have a clear record of pre-existing wear versus renovation-caused damage for any insurance or liability discussions.
Property Boundary and Security Enhancements
Renovations that touch the exterior of a home often prompt homeowners to reconsider their fencing and property boundaries at the same time. If your project includes a pool addition, expanded yard space, or pet containment needs, it’s worth getting quotes from an aluminum fence company while other exterior contractors are already on site. Coordinating this work alongside other outdoor improvements can reduce overall disruption to your landscaping.
Aluminum fencing tends to hold up well against weather and requires less maintenance than wood alternatives, which makes it a practical long-term choice for homeowners who just invested heavily in their property. Budgeting for this now, rather than treating it as an afterthought, ensures your finished property feels complete and secure.
Cooling System Backup and Emergency Repairs
Even with a newly upgraded HVAC system, it’s wise to set aside a small contingency fund for unexpected breakdowns, particularly if your renovation takes place during warmer months. Dust, debris, and temporary system shutoffs during construction can sometimes stress equipment that was otherwise working fine. Having a plan in place for emergency AC repairs means a sudden breakdown during a summer renovation doesn’t leave your household or your contractors working in uncomfortable conditions.
This contingency is especially important for households staying on-site during the renovation, since living without functioning cooling for even a few days can be more than an inconvenience. Building this into your budget as a just-in-case line item, rather than scrambling to find a solution later, keeps the rest of your project on track.
A successful whole home renovation depends as much on the systems you can’t see as the finishes you can. Budgeting for water heaters, HVAC equipment, roofing, plumbing, debris removal, outdoor structures, pest control, paved surfaces, fencing, and emergency repairs upfront protects both your investment and your peace of mind. Before you finalize your renovation plan, walk through each of these categories with your contractor and get realistic estimates rather than guesses. Taking this step now means fewer surprises later and a finished home that truly works as a whole.