
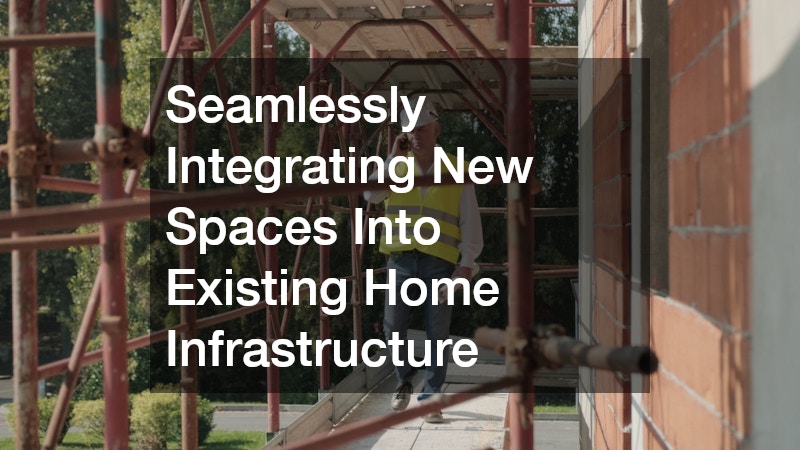
Adding a new room, garage, or outdoor living area to your home is exciting, but it can quickly turn stressful if the new space does not connect properly with your existing electrical, plumbing, and structural systems. Many homeowners focus so much on style and square footage that they overlook the behind-the-scenes work required to make an addition function like it was always part of the house.
This guide walks through the practical steps and systems you need to consider so your project looks polished and performs reliably for years to come. Whether you are building a sunroom, finishing a basement, or adding a dock behind your lake house, thoughtful planning now saves money and headaches later.
Start With a Clear Vision for the New Space
Before any construction begins, spend time defining exactly how the new space will be used day to day. A home office has very different infrastructure needs than a guest suite or an outdoor kitchen, and clarifying this early prevents costly design changes mid-project. For example, a home office may need two or three dedicated 20-amp circuits and extra data ports, while a guest suite prioritizes plumbing access and sound insulation, and an outdoor kitchen demands gas lines, weatherproof electrical, and drainage.
Walk through your daily routines and imagine how the addition will connect to existing hallways, doors, and outdoor access points. Consider foot traffic patterns: will family members cut through the new room to reach the backyard, or does it sit at the end of a hallway as a quiet retreat? Think about sightlines, natural light, and whether the space needs its own entrance or thermostat zone separate from the rest of the house.
This early groundwork makes every later decision, from wiring and HVAC capacity to flooring and window placement, much easier to plan. Sketching a simple bubble diagram of activities and traffic flow, even on paper, can reveal conflicts before a contractor ever breaks ground.
- Sketch how foot traffic will flow between the new space and the rest of the home, noting doorway placement, hallway width (aim for at least 36 inches for comfortable passage), and whether the addition creates a bottleneck near high-traffic areas like kitchens or entryways
- List must-have features versus nice-to-have extras, such as prioritizing electrical outlets and climate control over decorative built-ins, so budget cuts don’t compromise functionality
- Consider future needs, such as aging in place (zero-step entries, wider doorframes) or resale value, since even a home office could later convert into a bedroom
- Research local permit requirements before finalizing your layout, including zoning restrictions, setback rules, and inspection timelines, which can range from a few days to several weeks depending on your municipality
- Confirm how the new space will tie into existing utilities, like HVAC ductwork, plumbing lines, or electrical panel capacity, to avoid costly rework later
Evaluate Your Home’s Core Systems Before Building

Every addition places new demands on your home’s existing electrical and plumbing infrastructure, so a thorough evaluation upfront is essential. Licensed electric contractors can assess whether your current panel has enough capacity to support new outlets, lighting, and appliances without overloading circuits. Skipping this step is one of the most common reasons additions fail inspection or require expensive rework after walls are already closed up.
Plumbing is just as important, especially if the new space includes a bathroom, laundry area, or wet bar. Rerouting water lines and drainage can be complicated depending on your home’s age and existing layout, so it often makes sense to have plumbing repairs completed proactively on older pipes before tying in new fixtures. Addressing weak spots in your current plumbing system now prevents leaks or pressure issues once the new space is in use.
- Get a written assessment of your electrical panel capacity
- Ask about surge protection for added electronics or appliances
- Have existing pipes inspected for corrosion or pressure drops
- Confirm shutoff valve locations before demolition begins
Keep Comfort Consistent With Smart Climate Planning
One of the most overlooked aspects of integrating a new space is ensuring it stays comfortable year-round without straining your existing heating and cooling system. Many additions end up too hot in summer or too cold in winter because the ductwork was never properly extended or balanced. Experienced HVAC companies can calculate whether your current unit has enough capacity to handle the added square footage or whether a supplemental system makes more sense.
In some cases, a mini-split system is a better solution than extending existing ductwork, especially for additions that are far from the main air handler. This approach also allows independent temperature control, which is useful for spaces like sunrooms or home gyms that have different comfort needs than the rest of the house. Planning climate control early avoids the common mistake of finishing a room only to discover it is unusable during extreme weather.
- Have your system’s tonnage evaluated against total home square footage
- Ask about zoned systems for rooms with different usage patterns
- Consider insulation upgrades alongside any HVAC changes
- Request a load calculation rather than a rough estimate
Matching Exterior Materials for a Seamless Look

A new addition should look like it belongs, not like it was tacked on as an afterthought. Matching siding is one of the biggest visual factors, and reputable vinyl siding companies can help you find a close color and texture match even if your original siding has faded over time. In some cases, it may be more cost-effective to reside an entire wall or side of the house rather than trying to blend a small patch that never quite matches.
Paint is another detail that makes a huge difference in how seamless the transition feels between old and new construction. A skilled painting contractor can custom-mix colors to account for weathering on your existing exterior, ensuring trim, doors, and siding all look cohesive. Taking the time to get this right protects your home’s curb appeal and resale value.
- Bring a physical siding sample rather than relying on paint chip comparisons
- Ask about UV fading warranties on new siding materials
- Request test patches before committing to a full exterior repaint
- Consider weatherproof caulking at all new seams and joints
Protecting the New Structure From the Top Down
Roofing is one of the most technical aspects of tying a new addition into an existing home, particularly where two rooflines meet. Improper flashing at these junctions is a leading cause of leaks, so it is worth hiring an experienced roofing contractor who has specifically handled addition tie-ins before. They can also advise on whether your existing shingles are compatible with new materials or if a partial replacement makes more sense.
Pay close attention to how water will be diverted away from the new structure, since valleys and transitions created by additions often change existing drainage patterns. A qualified professional will map out gutter placement and downspout locations before construction begins, not after. This proactive approach prevents water damage that could otherwise show up months or years later.
- Ask for a written warranty specific to the new roofline tie-in
- Request photos of flashing installation before shingles go on
- Confirm that new materials match existing color and weight
- Plan gutter extensions as part of the original roofing scope
Choosing Interior Finishes That Flow Naturally

Interior finishes are what make a new space feel connected rather than separate, and flooring is often the biggest factor in that transition. If your existing home has carpet flooring throughout the bedrooms or living areas, matching the pile, color, and material in the new addition helps create a seamless visual flow from room to room. Even small differences in carpet texture or shade can make a new space feel disconnected, so it is worth requesting samples under your home’s actual lighting conditions.
Beyond flooring, consider trim profiles, door styles, and paint sheens throughout the new space to keep consistency with the rest of the home. Small mismatches in these details are often what makes an addition feel obviously “new” rather than original to the house. Taking time to match these finishes pays off in how naturally the space integrates over time.
- Request carpet samples in natural daylight, not just showroom lighting
- Match baseboard and door casing profiles to existing rooms
- Keep hardware finishes consistent across old and new spaces
- Consider transition strips carefully where flooring types change
Extending Your Outdoor Living Areas
Many homeowners expand their outdoor living space alongside an interior addition, and landscaping plays a big role in making these areas feel intentional rather than an afterthought. Fresh mulch around new garden beds or pathways can visually tie together newly disturbed soil with established landscaping, while also helping control weeds and retain moisture during the adjustment period. This small investment goes a long way toward making a new patio or sunroom feel like it has always belonged in the yard.
For properties near water, extending outdoor living might include upgrading or building new boat docks to match the scale of an expanded home. Coordinating dock design with your home’s overall aesthetic, including materials and color, helps create a cohesive property rather than a patchwork of unrelated structures. Whether it is a small addition or a larger waterfront upgrade, thinking about the full outdoor footprint prevents disjointed results.
- Refresh mulch beds after construction disturbs surrounding soil
- Choose mulch colors that complement your home’s exterior palette
- Match dock materials to your home’s overall style and finishes
- Plan outdoor lighting to unify new and existing exterior areas
Special Considerations for Health and Accessibility Focused Additions
Some additions serve very specific purposes, such as an in-law suite, home therapy room, or space designed for aging family members. These projects often benefit from lessons learned in healthcare construction, where accessibility, sanitation, and durability are top priorities. Wider doorways, non-slip flooring, and easy-to-clean surfaces are all details borrowed from professional healthcare environments that translate well into residential accessibility projects.
Even if your addition is not medical in nature, applying these accessibility principles can future-proof your home for changing needs. Grab bars, lever-style door handles, and zero-threshold entries are relatively inexpensive to include during construction but expensive to retrofit later. Planning with long-term flexibility in mind adds real value to your investment.
- Consider zero-threshold entries for wheelchair or walker access
- Install slip-resistant flooring in bathrooms and entryways
- Widen doorways to at least 32 inches of clear width
- Plan lighting that reduces shadows and glare for aging eyes
Setting a Realistic Budget and Timeline

Even the best-planned addition can become stressful if the budget and timeline are not realistic from the start. Costs for additions often run higher than initial estimates because of unexpected structural or system upgrades discovered once work begins — a foundation that needs reinforcing, outdated wiring that no longer meets code, or plumbing that has to be rerouted. Building in a contingency fund of at least ten to fifteen percent helps absorb these surprises without derailing the entire project.
Beyond materials and labor, homeowners should budget for often-overlooked expenses like permit fees, temporary storage, and the cost of living around active construction, such as eating out more often if the kitchen is offline. Getting itemized quotes from at least three contractors makes it easier to spot inconsistencies and negotiate with confidence.
Timelines deserve the same scrutiny as costs. A straightforward room addition might take eight to twelve weeks, but projects involving new utility connections, structural changes, or custom finishes can easily stretch to four to six months once permitting delays and material lead times are factored in. Asking contractors for a phase-by-phase schedule, with clear milestones for framing, inspections, and final walkthroughs, helps set expectations and makes it easier to catch delays before they compound into bigger setbacks.
Timeline delays are common as well, particularly when multiple trades need to coordinate their schedules around each other. A typical room addition involves six to ten different trades—framers, electricians, plumbers, HVAC technicians, drywallers, and finish carpenters—each of whom needs the previous phase completed before starting their own work. Clear communication with your general contractor about sequencing helps avoid situations where one delayed task holds up everyone else.
On the budget side, it’s wise to set aside a contingency fund of 10 to 20 percent beyond your initial estimate, since older homes in particular tend to reveal surprises once walls are opened up. Outdated wiring, hidden water damage, or foundation issues that don’t meet current code requirements can add thousands of dollars to a project that looked straightforward on paper. Getting a detailed line-item quote upfront, rather than a lump-sum estimate, makes it easier to see where costs might creep and to make informed trade-offs if adjustments become necessary.
Weather delays, permit approval times, and material lead times—especially for custom windows, cabinetry, or specialty fixtures—can each add weeks to a schedule that looked tight from the start. Building in buffer time for these variables, rather than assuming a best-case scenario, prevents a domino effect of missed deadlines. Setting realistic expectations from day one keeps the project moving smoothly and reduces frustration for everyone involved.
- Build a contingency budget of ten to fifteen percent above estimates, covering surprises like hidden wiring, rot, or outdated plumbing behind walls
- Get a written timeline with milestones for each phase of work, including start and end dates for demolition, framing, electrical, and finishing
- Ask how weather delays will be communicated and handled, and whether the contract specifies a notice period or makeup schedule
- Confirm payment schedules are tied to completed work, not calendar dates, such as 30% at framing completion rather than 30 days in
- Request itemized invoices at each payment stage so you can verify labor and material costs match the original estimate
- Set aside a separate buffer for permit fees or inspection re-visits, which often run a few hundred dollars beyond initial quotes
Integrating a new space into your existing home takes more than good design; it requires careful attention to structural, mechanical, and aesthetic details that make the addition feel like it was always part of the house. By evaluating your systems early, matching materials thoughtfully, and planning for both comfort and accessibility, you set your project up for lasting success. Take time to research qualified professionals for each phase of the work and ask plenty of questions before signing any contracts. With the right planning, your new space will feel like a natural extension of the home you already love.