

Renovating a home is exciting, but tackling projects in the wrong order can cost you thousands of dollars in redone work and wasted materials. Whether you are updating a single room or overhauling an entire property, the sequence in which you replace systems, surfaces, and structures matters just as much as the quality of the work itself. This guide walks you through a logical order of operations so you protect your investment, avoid tearing out fresh work to fix hidden problems, and keep your renovation budget on track. By the end, you will have a clear roadmap for deciding what to replace first, second, and last.
Start From the Top of the Structure

Before you touch paint colors or flooring samples, look up. Your roof is the single most important barrier protecting everything else you plan to renovate, and starting a project with a compromised roof almost always leads to water damage down the line. Even a small, unnoticed leak can quietly rot framing, ruin insulation, and stain freshly finished ceilings within a single rainy season.
A licensed residential roofer can inspect flashing, shingles, and decking to confirm the structure is sound before you invest in interior upgrades. This inspection should also check attic ventilation, gutter condition, and the age of the underlayment, since these details affect how long your roof will last after the renovation is complete. If your roof is more than 15-20 years old, it’s worth asking whether a full replacement makes more sense than patchwork repairs.
Timing this step first also protects your budget. Discovering roof damage after you’ve installed new drywall, cabinetry, or hardwood floors means paying twice: once for the roof fix, and again for the interior repairs it triggers. Confirming the roof’s integrity upfront lets every other renovation decision move forward with confidence.
If your roof is more than fifteen years old or shows signs of curling shingles, granule loss, or soft spots, address it before scheduling any other major work. Most asphalt shingle roofs are rated for 20 to 25 years, but harsh sun, poor attic ventilation, or previous storm damage can shorten that lifespan considerably. A quick inspection from a licensed roofer, along with a look in the attic for daylight, water stains, or sagging decking, will tell you how much runway you actually have left.
Replacing a roof after new drywall, cabinetry, or countertops are installed risks water intrusion damaging your fresh renovation. A single missed flashing point or a heavy rainstorm during a delayed roof job can mean torn-out ceilings, ruined insulation, and warped cabinetry that has to be replaced all over again. That’s an expensive and avoidable setback when the fix simply required reordering the project timeline.
Gutters and fascia deserve attention at this stage too, since they’re directly tied to the roof’s ability to shed water properly. Sagging gutters or rotted fascia boards can funnel moisture back into the walls even with a brand-new roof overhead.
Think of the roof as the foundation for everything happening below it, even though it sits at the top of the house. Get it inspected, budgeted, and scheduled first, then let every other decision about flooring, fixtures, or countertops follow from a structure you know is watertight.
- Schedule a professional roof inspection before finalizing any interior renovation budget, ideally 3-6 months out so repairs don’t compete with other trades for scheduling
- Check for granule loss, curling shingles, or soft spots in decking — these signal a roof nearing the end of its 20-25 year lifespan
- Repair or replace damaged flashing around chimneys, vents, and skylights first, since even minor gaps here cause the majority of hidden water damage
- Confirm attic insulation (R-38 to R-60 depending on climate zone) and ventilation are adequate before closing up ceilings or drywall
- Look for ice dam staining, condensation, or mold in the attic, as these point to airflow problems that new drywall will only conceal
- Document roof age, material, and warranty status in writing, since this paperwork can add real resale value and speeds up future insurance claims
Address What Is Hidden Underground
Many homeowners forget about the systems buried beneath their yard until something goes wrong, but underground infrastructure should be evaluated early in any major renovation. If your property relies on a septic or cesspool system, arrange for cesspool pumping and an inspection before starting landscaping, driveway work, or any exterior construction that could block future access. Digging up a newly poured patio or freshly planted lawn to fix a failing system is a costly mistake that proper sequencing avoids.
This step matters even more if you are adding square footage, a pool, or heavy structures like a shed or garage. Contractors need clear knowledge of where underground lines and tanks are located to avoid accidental damage during excavation. Getting this system checked and serviced early protects both your new construction and your long-term plumbing health.
- Request a full inspection before adding any hardscaping above the system
- Keep excavation equipment away from marked tank locations
- Schedule routine maintenance every three to five years depending on household size
- Share system maps with any contractor doing exterior digging
Plan Exterior Surfaces After Structural Work
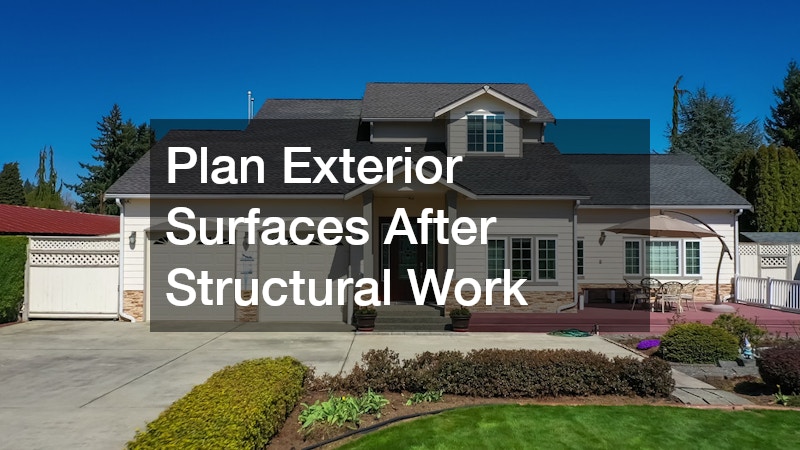
Once the roof and underground systems are handled, it is time to think about the surfaces surrounding your home. Driveways, walkways, and lawns should generally be addressed after any heavy equipment work is finished, since trucks and machinery can crack new asphalt or destroy freshly seeded grass. Reputable asphalt companies typically recommend scheduling paving projects toward the end of a renovation timeline, once all deliveries of heavy materials like lumber, tile, or appliances are complete.
Landscaping follows a similar logic. Hydroseeding is a popular and cost-effective way to establish a healthy lawn quickly, but it should happen after grading, irrigation installation, and any construction traffic has stopped. Seeding too early means your new lawn could be trampled or damaged before it has a chance to root properly.
- Finish all heavy equipment work before pouring new asphalt surfaces
- Wait until grading and irrigation lines are installed before hydroseeding
- Avoid walking on newly seeded areas for at least three to four weeks
- Coordinate delivery schedules to prevent damage to fresh paving
Upgrade Core Systems Before Cosmetic Finishes

Heating, cooling, plumbing, and electrical systems should always be addressed before cosmetic upgrades like paint, flooring, or fixtures. Cutting into new walls or flooring to run ductwork or rewire outlets defeats the purpose of a fresh renovation. An experienced HVAC contractor can evaluate whether your current system has the capacity to handle any additions, such as a finished basement or a home addition, before you finalize your interior design plans.
This step is especially important in older homes where ductwork may be undersized or electrical panels may be outdated. Addressing these systems first also gives you the opportunity to improve energy efficiency, which pays off in lower utility bills for years to come. Once systems are updated and tested, you can move forward with confidence that your finishes will not need to be disturbed again.
- Have ductwork and panel capacity assessed before finishing new rooms
- Replace aging units before they fail during peak seasons
- Seal and insulate ducts to improve efficiency during system upgrades
- Test new systems thoroughly before installing final wall and floor finishes
Handle Entryways and Perimeter Features
Garage doors and fencing are often overlooked in renovation planning, yet they play a major role in both security and curb appeal. Because garage doors are frequently used and exposed to weather, replacing an aging or damaged one early prevents operational issues and improves insulation for any attached living space. If your garage is being converted or expanded, this is also the ideal time to size a new door correctly for the updated opening.
Perimeter fencing should be planned around the same time as exterior grading and landscaping work, since installation often requires digging post holes that can disturb finished lawns. An iron fence is a durable option that holds up well against weather and requires minimal upkeep compared to wood alternatives. Installing it after major landscaping is set but before final lawn establishment helps avoid unnecessary repairs to soft, newly planted grass.
- Replace worn garage door springs, tracks, or panels before finishing garage interiors
- Choose insulated doors if the garage connects to living space
- Install perimeter fencing before final grading is complete
- Select fence materials based on climate and maintenance preferences
Consider Outdoor Living Additions Carefully
Decks and outdoor structures add valuable living space, but their materials and placement should be decided only after structural and system work is finished. Composite metal decking has become popular for homeowners who want durability without the maintenance demands of traditional wood, since it resists warping, rot, and pest damage over time. Because decking connects directly to the home’s structure, it should be installed after any framing, roofing, or siding repairs are complete to ensure proper flashing and water drainage.
Timing your deck project after major exterior work also protects your investment from construction debris and heavy foot traffic. If you are adding a deck alongside other renovations, coordinate the schedule so it goes in near the end of the outdoor phase, closer to landscaping and fencing work. This sequencing keeps the new structure looking clean and undamaged when the rest of the project wraps up.
- Confirm proper flashing where decking attaches to the house
- Choose low maintenance materials if long term upkeep is a concern
- Schedule deck installation after siding and roofing repairs
- Protect finished decking from equipment traffic during later phases
Save Interior Finish Work for Last
Kitchens and bathrooms are often the most exciting part of a renovation, but they should be among the final steps once structural, system, and exterior work is complete. Selecting countertops is a decision best made after plumbing and electrical rough-in work is finished, since cabinet layouts and appliance placements can shift during earlier planning stages. Waiting also allows you to see how natural light and finished flooring interact with different countertop materials before making a final choice.
This approach prevents costly mistakes like ordering custom stone before wall placement is finalized or damaging finished surfaces during other renovation phases. Once your systems are updated and structure is sound, finish selections become a much smoother and less stressful process. Interior finishes are also easier to adjust later than structural elements, so it makes sense to lock them in last.
- Finalize cabinet layout before measuring for countertop installation
- Choose materials based on durability needs in kitchens versus bathrooms
- Protect finished surfaces with coverings during remaining construction
- Confirm plumbing rough-in locations before ordering custom fixtures
Choose the Right Professional for Each Project Phase
 A successful renovation often involves multiple specialists rather than a single contractor handling everything from start to finish. A general remodeling contractor can help coordinate the overall project timeline, but specialized trades like roofing, HVAC, and paving typically require their own licensed experts. Hiring the right professional for each phase reduces the risk of mistakes and ensures the work meets local building codes.
Ask any contractor you are considering for references, proof of licensing, and a clear written timeline that shows how their work fits into the larger renovation schedule. Good communication between trades prevents scheduling conflicts, such as electricians and plumbers needing access to the same wall space at the same time. Taking time to vet professionals upfront saves headaches and delays once the project is underway.
- Request licensing and insurance documentation from every contractor
- Ask for a written project timeline before signing any contracts
- Confirm how subcontractors will coordinate scheduling conflicts
- Read recent reviews specific to the type of work being performed
Build a Realistic Timeline and Budget
Once you understand the correct sequence of replacements, the next step is mapping out a realistic timeline that accounts for permitting, material lead times, and seasonal weather. Some projects, like roofing or paving, are weather dependent and may need to be scheduled around specific times of year in your region. Building in buffer time for delays helps prevent rushed decisions that could compromise quality later in the project.
Budgeting should follow the same order as your renovation sequence, prioritizing funds for structural and system work before allocating money toward cosmetic finishes. This approach ensures that if unexpected costs arise, they affect the least critical parts of the project rather than the foundation of your home. A phased budget also makes it easier to pause between stages if needed without leaving your home vulnerable to damage.
- Set aside contingency funds for unexpected structural repairs
- Prioritize spending on systems and structure over cosmetic upgrades
- Schedule weather dependent projects during appropriate seasons
- Break large renovations into phases to manage cash flow effectively
Sequencing your renovation correctly protects your budget, your timeline, and the quality of every upgrade you make. By starting with the roof and underground systems, moving through core systems and exterior features, and finishing with interior details like countertops, you avoid the frustration of redoing completed work. Take time to plan each phase carefully and consult qualified professionals before breaking ground on your next project. With a clear sequence in place, you can renovate with confidence and enjoy lasting results for years to come.